Posts

Lab 13 | Using an Intrusion Detection System

Image
Lab 13 | Using an Intrusion Detection System This lab followed a similar network setup to the previous lab except we are using SECONION instead of PFSENSE. This lab was brief and had us undergo some exercises involving SECONION. We played around with different forms of traffic that SECONION picked up, SECONION proved capable in showing the detail of the traffic that passed through it, as well as having the ability to filter out unwanted alerts. First demonstrated was the ability to intercept packets, much similar to wire shark we can view their contents & details. Speaking of wireshark it is possible to open the probe within wireshark as well as other programs. Demonstrated in the lab it is possible to dismiss alerts so that they no longer appear in the sguil interface if they are not relevant to you, this information is still stored in the database however if you wish to use it another time. Within the second exercise, we explored the ability to block alerts...

Lab 11 | Implementing a Secure Network Design

Image
Lab 11 | Implementing a Secure Network Design This lab is demonstrating a man in the middle arp attack and also dabbling in using VLANs and subnets. In the first exercise of the lab we set up a redirection the redirected users requesting the 'HTTP' version of the local website to the 'HTTPS' session instead, this was in preparation for implementing authentication to our website that is protected by a serverside cert & TLS. This exercise was essentially following the steps to install the measures I spoke of, once this was implemented our website could not be connected to without the ability for the user to authenticate with username & password as well as our certificate environment functioning correctly which was the source of many peoples problems whilst trying to get the website to open again.  Following this setup in exercise to we executed an arp poison attack on a specific target range. Following this, we used kali to sniff the tr...

Lab 10 | Using Account Management Tools

Image
Lab 10 | Using Account Management Tools -------------------------------------------------------------------------------------------------------------------------- Beginning the lab we used process explorer which is in practice a more advanced version of task manager that offers more information & control over the process that is currently active on the machine, we activated the 'user' column which allowed us to see which user authority was running each process. This interface also offered a more accurate CPU reading which the default task manager sometimes can fail to do. It is important to understand what is business as usual and what is an unneeded or possibly malicious process. Malware will often attempt to appear as non-conspicuous as possible to avoid user detection. -------------------------------------------------------------------------------------------------------------------------  --------------------------------------------------------------...

Lab 12 | Implementing a Firewall

Image
Lab 12 | Implementing a Firewall After considerable trouble, I was able to get my lab setup capable of connecting to the pfsense gui, I was aided by classmates as well as the tutor reconfiguring the routers for us. From this, I learnt that I need to check the adapter settings within both the router and vmware to ensure that I have my connections plugged into the right ports, I originally overlooked this by making an assumption that the ports in vmware were in the same order as the ports in the router itself. Following the execution of the mtr tool we reviewed some of the available status statistics that pfsense offers us, this included: showing CPU load by processes traffic graph interface statistics, blocked and allowed packet Also offered were different types of logs, system and firewall being pointed out as the most important logs. System logs show events that are affecting the operation of the appliance whereas firewall logs show events tha...

Lab 7 | Implementing Public Key Infrastructure

Image
Lab 7 | Implementing Public Key Infrastructure The following lab is designed to help us become more familiar with the basic concepts of cryptography and partake in the process of implementing a public key infrastructure.   We started by inspecting elements inside the certificate authority, interesting to learn was that the certificate authority contains a certificate the authenticates itself, issued by itself. If subordinate CA's were produced they would instead have certificates issued by this CA instead of themselves, I also learnt that root CA's are typically kept offline unless they have actions they need to perform, this further solidifies a networks security posture. We inspecting multiple elements of a certificates authorities & the lab text gave informative information on many of them. Next, we undertook the tasks of implementing a certificate ourselves. We created a certificate in our VM that is hosting the classroom website, ...

Lab 8 | Deploying Certificates and Implementing Key Recovery

Image
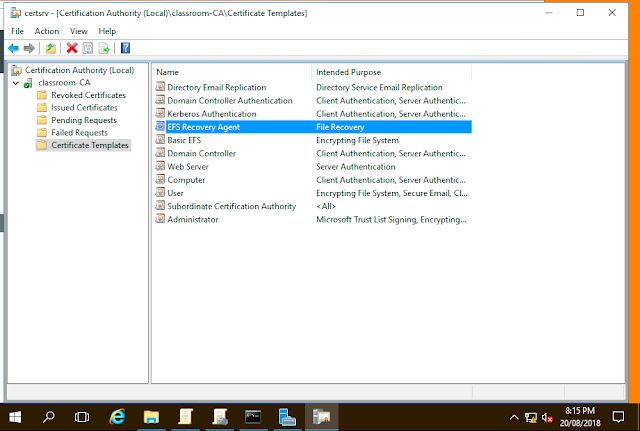
Lab 8 | Deploying Certificates and Implementing Key Recovery In this lab, we are experimenting with key recovery whilst also learning more about some more nuances of the certificate authority service.   First, we requested a certificate to our WIN10-WS machine from a browser console, this took some problem solving from people in the class due to the original instructions not working in Microsoft edge, it only worked within internet explorer with a specific configuration. Viewing the recovery certificate thumbnails, these were noted down for later use to ensure we were still working with the correct certificate. Retrieving the certificate using the serial number of the certificate Successful recovery of the certificate file in WIN10-WS, using the password. Successfully regaining access to the files after we deleted the certificate, we used the key recovery to reinstate the certificate that was deleted. Lab Questions Ex 3 | 5 ...

Lab 5 | Using Network Scanning Tools 2

Image
Lab 5 | Using Network Scanning Tools 2 In this lab, we further explore the capability of network scanning tools that monitor the communications between hosts running on our local network. For this lab to function correctly we need to use a virtual router that has 'promiscuous' mode enabled which allows one port to read all the traffic that is going through the router it is connected to. This is also commonly known as port mirroring.  We have used the application 'Wireshark' to inspect the traffic that we are picking up, using this we can see the content of frames including the information at each layer which proves to be rather extensive in that we can see the contents of the packet entirely. Pictures above is a DHCP frame. Above we are following the content stream of an SMB2 frame, this interface shows the communication between the two hosts which is defined by the blue & red colouring. This allows us to observe the exchange between two host...